Showing posts with label desserts. Show all posts

03 August 2014

Recycling kitchen disasters

It started off as a good day. Breakfast and lunch got done in record time. All of the  weekend's critical chores were accomplished before 10am. I decided that was a good time to bake my patented triple chocolate brownies. In bulk. 

As things go, it wasn't a bad idea. I had everything I wanted, in the quantities I wanted. I started and made up a really huge quantity, almost a bucketful, of batter. The first batch went into the oven.

That's when things started to go wrong. My no fail brownies, that usually took 35 to 40 minutes, were nowhere near done. I kept them in the oven, checking at regular intervals, and after nearly an hour, my tester showed that they were done.

But, no... Instead of a papery crust, I had a really thick biscuit like crust. And the inside, while done, had a really peculiar texture. The thingummy (I refuse to call it a brownie) tastes exactly the way it should, but the finish was beyond weird.

The next 4 trays went that way too. I got about 40 decent sized brownies, and 2 kilograms of something that looked like it came from Mars.

Now, after all that hard work, I couldn't really bring myself to discard all that, for want of a better term, scrap....

I put out an SOS to a friend who runs a baking business. Her first question was, "Are they merely chewy or outright gooey?"  

Huh?!? What'd that have to do with anything? Turns out, since the brownies were gooey, they were perfect for 'Brownie pops'... But that's something I've never tried before. But there was this huge pan full of 'gooey stuff' sitting on my kitchen counter, who's future hung in the balance. Because the brownies were really 'gooey' I didn't even need any frosting to bind them. 

I tossed the crispier, chunkier, and crusty bits into a food processor and pulsed it for about a minute. After adding it back to the rest of the crumbs, I mixed the well, and rolled them into balls, about roughly the size of a ping pong ball (diameter of between 4 and 5 cms), and refrigerated them for about 2 hours. 

Here's where I made a few huge mistakes. The cakepops need to be smaller, about 2-3 cms in diameter. These were so heavy that the lolipop skewers couldn't hold the weight, and were arched at an alarming angle while the pops were cooling. Sprinkling sprinkles over the chocolate coated pops is an insanely messy job. Rolling chocolate coated pops in a plate of sprinkles is even messier. You get chocolate coated sprinkle clumps (blech). 


After about ten pops that were top heavy, I totally gave up.


I had some 30 chilled pops, and it was way too much work to resize the whole bunch. I picked up a few cupcake liners and put one chocolate dipped pop in each, and topped it with some sprinkles.


To make pops

Chocolate ( white, dark, milk chocolate)
Sprinkles
Toothpicks or lollipop skewers
Thermacol for holding lollipop skewers upright.


Bring water to boil in a pan.
Place another pan or bowl over it, so that the bottom doesn't touch the water.
Reduce heat to a simmer, and start to melt chocolate of your choice over double boiler.
When, chocolate complete melted, insert toothpick or lollipop skewer into the cakepops and slowly dip in the melted chocolate, covering completely.
If you're making pops, skewer into the thermacol and allow to cool.
While chocolate is still wet, coat pops with choice of sprinkles, and allow to cool completely till chocolate is set.

31 July 2014

Carrot cupcakes

I get to listen to a lot of lectures in life. Lectures about how I need to lose weight, how I need to stop eating fatty foods, and how I need to stop eating cakes and cookies. I've also heard one about how I need to stop baking and start to learn to make the traditional snacks, all of which are deep fried. Go figure.

To me baking is a thing of joy. To me it's a total stressbuster. It takes a lot of concentration and precision, and forces one to switch off all external thoughts and focus on the recipe.

Today's baking binge was a little elaborte. I picked something that needed a lot of prepping. I decided against using any appliances, and went the old fashioned hands only route, took a little longer, but ended up a lot happier in the bargain.

I've always wanted to make a 'good' carrot cake, but the few attempts ended in products that shall not be spoken about. I got my hands on a recipe for carrot cupcakes today, and this was a winner.
A carrot cake requires sligtly longer prep time. Carrots need to be grated fine, walnuts need to be chopped, and if you're not using store bought applesauce, you need to finely grate some apples too.
Despite the long prep time, the end result was absolutely worth it. A beautifully moist cupcake that, in my humble opinion, tasted great without the frosting.

Carrot Cupcakes

200 g Flour/Maida
75 g Walnuts (chopped fine)
1 tsp Baking powder
1/4 tsp Salt
1 tsp Cinnamon powder
1/4 tsp Nutmeg powder
2 large eggs
120 g Sugar
1/2 cup Oil
1 tsp Vanilla extract
1 cup Carrots, finely grated
1 cup Apples, finely grated


Preheat oven to 180°C. Line a muffin tray with cupcake liners.
Whisk together flour, walnuts, baking powder, salt, cinnamon and nutmeg powders and keep aside.
Beat eggs till fluffy. Add oil, vanilla extract and sugar, and beat till the mixture thickens. Add the grated carrots and apples.
Fold in the flour mixture.
Pour into the prepared moulds and bake for 25-30 minutes, or till a tester inserted into the cupcakes comes out clean.

11 April 2008

Fruity dessert

Much as I hate to admit it, I spend more time leafing through some of my cookbooks, than to try and make something out of those glossy pages. More often than not, I am too zonked by the time the kids are fed and watered. And end up simply looking at a dessert instead of making and eating some.

And there are days when I'm motivated enough to make something, and the other half goes... "Hmmmm... make anything you feel. I don't want to eat any. I'm getting fat..."

If anything could kill the enthusiasm to try something new, that certainly did.

But then, there are days when one simply has to munch on something sweet. Some indulgence, or comfort food is called for.

On one of those days of flipping through one of my books, I saw THE dessert. It was a warm dessert (perfect on a late winter day), it was healthy, it had no added sugar, no fat.... In other words, it was PERFECT. There was no reason that the other half could even say no to this one.

When I brought this to the table after a light lunch, he looked rather skeptical, and said he'd eat some later. I used a up a month's worth of guilt trips to coax him into eating some.

Surprisingly, the kids loved it too. The older one (who's the founder president of the Fussy-Eaters Anonymous) had seconds, and the baby ate certain parts of it, and spit out the rest. But she did eat plenty.

Here's the recipe.

I did make a few changes to the original recipe. I was in the zone to make this dessert, and used what I had on hand, as I was not up to dressing my toddler in half her wardrobe for a ten minute trip to a store. Because the end result was spectacular, I believe that this recipe lends itself to a lot of flexibility.

Baked Winter Fruit Salad
Adapted from Williams Sonoma Desserts

1 cup mixed dried fruit (apricots, pitted prunes, raisins)
2 Apples (peeled, cored, cut in wedges)
1 Oranges (peeled, sectioned, membranes removed)
2 Pears (peeled, cored and cut in wedges)
1 stick Cinnamon
2 cups fresh Orange juice (or apple cider)


Place all the fruits, Orange juice (or apple cider)in a large bowl. Toss to combine.
Cover and allow to soak for 3 hours at room temperature.
Preheat oven to 180°C.
Pour the fruits with liquid and cinnamon stick in a large ceramic or glass baking dish.
Cover with aluminium foil and bake for about 40 minutes, until the liquid is bubbling and the fruits are soft.
Remove from oven, and allow to cool a little.
Remove cinnamon stick.
Spoon into individual dishes and serve warm.

Notes:

  • The original recipe calls for a combination of orange juice and sherry for soaking the fruits. I left out the sherry.
  • I baked the fruit in two batches (oven is too small). The first time, I baked the fruits in a metal dish. That's an absolute no-no. The metal and the citrus of the orange juice have a weird reaction, and leave a terrible aftertaste. The second batch was baked in a ceramic dish. That tasted wonderful.
  • For some odd reason, my oranges totally disintegrated during the baking. Anyone know why?

(And before you ask, I was not concentrating while adding a title to the photo, and ended up calling it 'compote'. I just noticed that, and will get around to correcting it sometime..... I don't want to lose blogging momentum while I'm at this :P)

31 March 2008

Bananas and walnuts and variations

My daughter loves pancakes. That's one breakfast that's super easy to make, goes down fast and without too much prodding. But then again, each bag of pancake flour seems to last for forever and a day. Sometimes, just the sight of that bag of pancake flour in the pantry bugs me. There isn't any rational reason for that, but it just irritates me how it never ever seems to get used up. I use less that quarter of a cup each time, and it takes for ever to finish each packet.

Then one day, I saw this post in Mahanandi, and followed the link to this recipe. I couldn't have asked for more.

The first time, I followed the recipe exactly. It was awesome. Another time, I thought I'd make muffins for breakfast using the same recipe. I left out the sugar this time around. The pancake flour and bananas were sweet enough for these delicious muffins. I used more bananas, and reduced the oil as suggested in the original recipe. And since the kids kept spitting out the walnut bits, I powdered them coarsely. No chunk(ie)s for my little monkeys.

Banana and walnut muffins
makes 8

1 cup pancake flour
1/2 cup - walnuts (coarsely powdered)
2 bananas (peeled and mashed smooth)
2 tbsp oil
2 tbsp milk
1/2 tsp cinnamon
1 pinch nutmeg
1 tsp baking powder


Preheat oven to 160° C.
Stir together flour, baking powder, spices, and nuts.
Mix the wet ingredients.
Make a well in the flour mix, pour the wet mix. Stir until just combined.
Pour into muffin cups, and bake for 20 mins (till done)

Notes:
Try pureeing the bananas in a blender. That gives these muffins a smoother finish.

* * * * * * * * * * * * * * * * * * * * *

And then I wondered what would happen if I left out the milk and oil too..

I read somewhere on the Fatfree Vegan Blog that applesauce is a good substitute for butter and other fats in baking. I checked in a few stores here, but couldn't find any. So I shelved my ideas for fat-free baking for a while.

Then one day, a friend, D, called and asked if I was free, and whether she could drop by. I thought I would bake this cake for tea. And took a deep breath, and decided to make this dish the fat-free way. I pureed an apple, and stirred that puree into the batter. The final result was good. It was wonderful with afternoon tea, but not sweet enough to classify as a cake. I called it a Banana-Walnut loaf.

Banana Walnut loaf

1 cup pancake flour
1/2 cup - walnuts (coarsely powdered)
1/4 cup cashewnuts and almonds (powdered fine)
1/2 tsp cinnamon
1/2 tsp dry ginger
1 pinch nutmeg
1 tsp baking powder
1 tsp vanilla essence
2 bananas (peeled and mashed smooth)
1 apple (peeled, cored and pureed)


Preheat oven to 160° C.
Line a loaf tin with baking parchment.
Stir together flour, baking powder, cinnamon, nutmeg, walnut powder and almond-cashewnut powder. Make a well.
Pour pureed apple and bananas, and vanilla essence into the well.
Mix well.
Pour into prepared baking tin, and bake for 40 minutes (or till a tester inserted into the loaf comes out clean).
* * * * * * * * * * * * * * * * * * * * *

This particular experiment resulted in totally mixed reactions. D, who was over for afternoon tea, said it was great and found it difficult to believe it had no fat and refined suar in it. My daughter took one bite, and said she didn't like it. The baby spit it out. The other half said it was a good 'fat-free, sugarless cake'.. go figure...

Will I make this again?? Of course I will... I personally think it's a great thing to have around for a guilt-free snack.
But wait, there's more.... The next day, as soon as she got back from school, the older one suddenly asked for 'banana cake'. And had seconds and thirds. After she was done eating, I had to ask her why she didn't eat any the previous day. "Amma, yesterday the cake was not tasty. Today it is. Make it this way from now on."

And since Akka was eating some, the baby too ate some. And later in the evening, pointed to the cake tin asking for more.

Kids!!!! They'll drive me nuts one of these days.... And I can see the occasional gray hair too....

15 March 2008

Kesari

Much as I hate to, I have to admit that the OH is reasonably low maintenance when it comes to food. Of course, has a long list of things that he refuses to eat, but he's rather easy to please when it comes to dessert. Doesn't matter if I'm willing to try something really complex. He's always happy with a bowl of rava-kesari (saffron-flavoured semolina pudding) and that is breeze to whip up.

Any festival, or special days that call for a sweet naivedyam, he always says, "make rava-kesari". This is one dessert can be scaled up or down with minimum fuss. Sometimes, I whip up a little rava-kesari with breakfast as a special treat.


And the kids love it too. Since the basic rava-kesari takes so little time and effort to make from scratch it's a regular on weekend and snack time menus.

And when we have company, it's an easy dessert to make. Since our friends here find the average Indian sweets 'too sweet', I serve it in teaspoon-sized dollops in candy cups.. That gives guests a chance to try a very small quantity (without being impolite) and also not overwhelm them with a large serving.


I also have an irrational dislike of synthetic food coloring which I use only under duress. To give my rava-kesari a nice colour, I do one of two things, or both, as the occassion (or mood) demands. One option is to add a pinch of turmeric to the semolina while it's roasting. Another is to soak the saffron in one tablespoon of hot water for a few minutes before adding the saffron (and water) to the kesari.

Rava-kesari

1/2 cup semolina/sooji/rava
1 cup hot water
3/4 cup to 1 cup sugar r (depending on taste)
1 pinch turmeric (optional)
1/2 cup to 3/4 cup ghee (to taste)
1 pinch cardomom powder
1 pinch (generous) saffron strands
1 tbsp cashewnuts

Soak saffron strands in 1 tbsp hot water.
Heat ghee in a heavy bottomed pan.
Fry cashewnuts till golden brown, remove from ghee and keep aside.
Add semolina to ghee and fry till golden.
If using, add turmeric and roast for a few seconds.
Add boiling water and saffron, and stir till the mixture is lump free.
Cook on a low flame till water is absorbed, and the mixture is dry.
Add sugar, and stir continuously to ensure there are no lumps.
Continue to cook on very low heat for 5 minutes.
Stir in ghee a little at a time till it's fully absorbed.
With the last addition of ghee, add the cardomom and cashewnuts .
Serve hot, warm or cold.

17 February 2008

Soup, salad and some indulgence

Weekday lunches, are something the other half and I look forward to. On weekdays, lunch is the most relaxed and 'No-don't'-free meal. By the time the OH comes home for lunch, the littlest one is fed and watered, and not very likely to be noisy. If we're very lucky, she might even be asleep, and we might even have a 'real' conversation.

Lunch is one meal where I can try something different, and not worry about whether it would suit little palates. Lunch is when I can really experiment. And try to make something elaborate or fancy. Or in other words, food that makes the other-half take skeptical or even outright suspicious looks or sniffs.

And since I'm focusing on eating healthy, I thought of making a soup and salad lunch.

I'd bookmarked this recipe from the FatFree Vegan Kitchen. As usual, I didn't have half the ingredients in hand, didn't have the enthusiasm to trudge through gale and snow to a store, and decided to make do with what I had. I garnished this soup with fresh roasted and crushed coriander seeds. That acted as a thickener, and gave the soup a lovely spicy boost.

Lentil and Vegetable soup
serves 2

1/4 cup lentils (whole masur dal)
1 carrot (peeled and sliced thick)
1 medium potato (peeled and cubed)
1/4 cup cauliflower florets
1 large onion (sliced fine)
1/4 tsp black pepper powder
1/4 tsp turmeric
1 large tomato (chopped fine)
1 tbsp coriander seeds
salt to taste


Wash lentils, and soak for 30 minutes.
In a pressure cooker, cook lentils. carrots, onions, potato, cauliflower, salt, turmeric and pepper with 4 cups water, for about 7 minutes.
Roast coriander seeds till fragrant, and crush to a coarse powder.
Add chopped tomato to the lentil mix, and simmer for for 10 minutes or till the tomato is cooked through.
Season with coriander powder and adjust salt if needed.
Serve hot.

After the soup was done, I wanted to try something new. I thought I'd try my hand at a terrine. The rice was rather dry. Next time I would like to toss some cottage cheese with the rice, and see if that would make it less dry.

Potato and Rice Terrine
serves 2

1 large Potato (Peeled and sliced)
1/2 cup cooked rice
1/2 cup vegetable stock


Heat oven to 180ºC.
Line 2 ramekins with Baking parchment.
Warm vegetable stock (about 40ºC)
Soak potato slices in vegetable stock for 15-20 minutes.
Remove slices from stock. Reserve stock.
Arrange a few slices of potato in the bottom of each ramekin. (reserve 2 large potato slices for later use)
Fill each ramekin with cooked rice.
Cover ramekins with baking parchment, and bake for about 20 minutes.
Drizzle reserved stock over the rice in both ramekins.
Cover with reserved potato slice.
Cover ramekins again with baking parchment, and bake for 20-25 minutes.
Invert over a plate and serve hot.

And now that our lunch was so wonderfully healthy, I just had to add some indulgence.

No-fuss Mango Dessert
serves 2

1 cup + 2 tbsp mango pulp
1/2 cup low fat Mascarpone cheese
Sugar to taste (optional)


Whisk Mascarpone, 1 cup mango pulp and sugar (if using) till smooth and the mixture starts to thicken.
Divide equally into dessert bowls.
Top with reserved mango pulp.
Chill for an hour.
Serve cold.

17 September 2007

Art, sweets and some Math

An acquaintance of ours, Mrs. Y, has been asking me for a while to conduct an "Understand India" session at one of the various organizations she's a patron of. Understand India? It sounded too broad a brief, and I agreed, without a single clue what I was going to do or talk about. My abysmal Japanese notwithstanding.

Once I was given the brief it didn't sound that bad. "Think of a typically Indian activity for kids, and make one Indian dish that the kids can also help make." All right. That didn't sound too bad. But as D-day loomed, I hadn't thought of a single thing that was "typically Indian". Then I realised, that I'd comitted to this session on the same date Ganesha chaturthi, and inspired by that, I said I'd show kids about Rangoli. That idea was a really winner. The kids really enjoyed it, and had a whale of a time giving free reign to their limitless imagination.

For the typically Indian dish, I had major constrains. The venue had just a small hot plate. I had work with that. That ruled out most traditional stuff. And it had to be kid friendly. Decisions, decisions!

I finally decided on 'maalaadu', an old favourite, that was simple enough to make. I powdered the pottu kadalai (roasted-chana-dal) and sugar in advance, and all that there was to do, was the assembly. And that too went down quite well. So after sweating it out in the sun, we all sat down to a very welcome snack of 'maalaadu' and lassi.

Maalaadu/Besan laddoo

1/2 kg Roasted chana dal/pottu kadalai (finely powdered)
1/2 kg sugar (finely powdered)
1/4 tsp cardomom powder
1/2 kg ghee


Mix the dry ingredients well in a large bowl.
Heat the ghee.
Pour over the powders, and stir in well with a wooden spoon, or spatula.
Mix well.
Shape into laddoos while still warm.

During the introduction, Mrs Y introduced India and Indians to the kids as mathematical geniuses. Genius?? Well, the kids started throwing numbers at me, asking to multiply them mentally. And these were numbers they could manage. All under 20. At this point, the imp in me took over, and I started demonstrating the finer points of vedic mathematics to these kids. Just a couple of 'sutras', but sutras that I was very very sure about. The very elementary, simple ones. Soon I had kids writing numbers on the board, and writing out the answers before they could key in and get the answer from a calculator. God, that was some ego trip! The awe on the faces of the students, and teachers alike, had to be seen to be believed. So in this neck of the woods at least, we have kids thinking that Indians have a second brain for mathematics.

Thank goodness they didn't want to look at my marks cards.

16 August 2007

White Chocolate & Macadamia nut cookies

Cookies. To cook or not to cook. That is the question...

Pardon that inexcusably bad pun. Baking cookies is a bit of a challenge here. I like my cookies crisp and crunchy, the significant other likes his soft and chewy. And whether my daughter deigns to eat a homemade cookie or not depends on the phase of the moon, the time of the day, the tides, eclipses and what not.

Recent the So asked why I never bake his favourite White Chocolate, & Macadamia nut cookies. Hmmm.. let me see.. could it be because he always complains that my cookies are crunchy? I decided that if he wanted (un)baked cookies (read soft cookies), that's what he'd get.

So I trawled good old Epicurious and found this recipe for White chocolate, Cranberries and Macadania nut cookies. That was half the job done. Considering that the SO wasn't that big a fan of cranberries, I left those out. This is a fairly straightforward recipe, but there was this really challenging step. To take the cookies out of the oven at the right time. And wince when they were not baked to tooth-challenging-crunching-satisfaction. Ah well, the sacrifices I make!!!!!

I'd planned to take the kids to the park, so I dropped off one batch of cookies at A's office, and off I headed to my daughter's favourite park. My phone buzzed. It was A. I was mentally braced for "not quite the way I like them".

A said that he had just bitten into the first of the cookies. And??? I waited with breathless anticipitation... "these are the best cookies I've ever eaten!" I wasn't too sure I'd heard right. And after he went on in the same note for a while, I finally breathed a sigh of relief. The little one came running, and asked for a snack. I gave her a cookie. She took a bite. She gave me a funny look. "Amma, this is not cookie. This is not cake," .... Thus spake the little gourmet, and ran back the swings.

Ah well, I can't please everyone. One gourmet at a time, thank you.

White Chocolate, & Macadamia nut cookies
(makes about 40)

3 cups flour
1 tsp baking soda
3/4 tsp salt
1 cup unsalted butter (room temperature)
1 cup brown sugar
3/4 cup white granulated sugar
2 large eggs
1 tbsp vanilla essence
2 cups white chocolate chips (or coarsely chopped white chocolate)
1 1/2 cup coarsely chopped Macadamia nuts


Preheat oven to 175°C.
Sift together salt, flour and baking powder and keep aside.
Beat butter till fluffy. Add both the sugars, and beat till well mixed.
Beat in eggs and vanilla.
Add the sifted flour and beat until just blended.
Stir in chocolate and nuts.
Drop dough into cookie sheets, 1.5-2 tbsp at a time, spacing them about 2" apart.
Bake for 15-18 minutes until just golden.
Cool on sheets.

I tried these cookies with a mix of peanuts and macadamia nuts. Those turned out fairly well too. This recipe is a keeper. All I need to do is resist the temptation to bake them a little longer.
And I have to admit, these taste better chewy than crunchy.

06 May 2007

Guilt-free Dessert

Once upon a time yours truly would go on dessert binges. When I say binge, I mean binge. Still skeptical?? Hmmm... let me see... There was this time a friend and I were celebrating our very first salaries. And we decided that nothing less than a total splurge would suffice! And we had this multi course lunch. We ordered the entire dessert menu at our favourite restaurant for lunch, and then went to our favourite ice cream parlor for dessert.

Those were also the days when I used to run. And my favourite pair of jeans never had to strain to accommodate all that dessert. To cut a long story short, those days are now fond history. These days I just have to look at a dessert and last years jeans scream out in horror... "no, no, no more please!"

Now that I'm experimenting with low-fat sugar-free foods, this seemed a good time to make something I've wanted to try for ages. Thick yogurt and fruit, sans sugar.

I'm big fan of flavoured yogurts. I love shrikhand and mishti doi. Store bought flavoured yogurt is fine too, but I always wished the texture could be creamier. And since my friendly neighbourhood vegetable store's shelves are full of fruit these days, this seemed to be the right time to try out this dessert.

Active time is quite little: drain yogurt for 2 hours. Cut as many fruits as you wish to add, stir the residue till smooth, top with cut fruits, and voila, dessert's up!

Verdict: light, cool, yummy, and guilt free. The little one too had her share, and didn't ask for sugar or honey to go with it!

Creamy Yogurt with Fruit
Serves 6


10 cups yogurt
2 cups strawberries, halved
1 cup grapes
1 cup pineapple chunks

Set a colander over a large bowl and line colander with a muslin cloth.
Pour yogurt into colander and let it drain in the refrigerator for 2 hours.
Transfer the yogurt in the colander to a serving bowl.
* Stir gently till smooth.
Garnish with fruits.
Chill till ready to serve.

* Optional
Add 1 or 2 tbsp honey or powdered sugar to the yogurt while stirring.

Notes:
The volume of curd reduces after draining. So for each 1-cup serving, you'll need about twice the volume of fresh yogurt.
If using low-fat or 2% yogurt, 1 hour draining time is enough.
Oranges, apples and banana slices can also be used.

05 May 2007

A spoonful of sugar

I can't think of anyone who would refuse a little sweet something after a meal. There's a child in everyone of us who eagerly anticipates dessert after dinner, a treat on an outing, and of course, a birthday cake.

And there are also loved ones in every family who, due to diabetes, are denied that small pleasure. My father-in-law too belongs to that group. He's also the sort who prefers to keep his sugar levels under control with a strict diet, and a bare minimum of medication.

Ever since we got married, at every festive occasion my f-i-l has been the only one to forgo the sweet course. I always felt bad that he had to miss out on the best part of every meal.

For a while now I've had this idea that I should experiment with sugar-free desserts, and this year, I've done so. For the Tamil new year, I made a special semiya paayasam. And recently, a nice badam kheer. Those are for another post.

Last week was his birthday, and this time I was determined that he should have a birthday cake. And This was what he got.


A sugarless sponge, topped with whipped cream and strawberries. And the best part, it had just one teaspoon of sugar. Yes, just a single teaspoon of sugar in that entire cake.

Now the kicker: the verdict. F-i-l liked it, as it met all his dietary criteria. And that it was a birthday cake he could eat to his heart's content. Everyone else thought it was .. hmmm... not sweet. But the person it was intended for appreciated it :)

Would you like to try it out??

Sugarless Strawberry Sponge

Sponge
2 large eggs (separated)
1 tsp powdered sugar
1/4 tsp vanilla essence
4 tbsp flour
1/2 tsp baking powder

3/4 cup whipping cream
fruits for garnish

Sift flour and baking powder thrice.

Preheat oven to 160 degrees C.
Grease and dust a 18cm diameter round tin (or equivalent).
Beat egg yolks, vanilla essence and 1/2 tsp sugar till very pale, and beaters start to leave a ribbon trail when lifted.
Beat egg whites with 1/2 tsp sugar till stiff peaks hold.
Add egg whites to the yolks, little at a time, folding gently after each addition.
Gently fold in the flour.
Bake for 15 minsutes, or till tester inserted into cake comes out clean.
Remove cake from tin and cool completely.

Whip cream.
Spread over sponge, and garnish with fruits.

18 April 2007

Fruit Cake - II

Over the winter, with the new baby at home, there's been a steady stream of visitors. And I found it very easy to make up really large batches of fruitcake, and my visitors too loved those. And since fruitcake has such a wonderfully long shelf life, there's always something nice to snack on.

After my last batch of fruitcake, I trawled around for recipes, and finally located an old notebook of mine with a recipe of the very first fruitcake that got me hooked. And I got started on a marathon baking spree in late January.

When my mother visited me, a lot of friends from Mysore had sent me loads of snacks, spice mixes, podis and other assorted yummies. I thought this would be a great thank you gift. My mom was slightly stunned at the final amount of batter. It was almost a day long baking session. My only complaint is that my oven is in proportion to the size of my kitchen, and my kitchen is slightly larger than a closet. You get the idea. I could bake only 2 regular, or 3 small loaf pans at a time. And at the end of it all, I got some 6 small cakes, and 6 large cakes. And then never found time to take a picture or post that gem.

Everyone who received a cake was quite thrilled and most polished it off in less than 15 minutes. An average of 2 hours per cake, and all gone in 10-15 minutes??? Must have tasted great!!!

After packing off the gifts, I kept a few slabs for myself, and forgot all about them. Last week, I desperately wanted something sweet, and decided to attack some of this fruitcake, and it was awesome. It had matured beautifully, texture was wonderfully firm... and tasted absolutely wonderful!

In that mellow frame of mind, I now post one of the most time consuming, but still worth-every-minute of it recipe.

Before I get started, let me mention that one of the most important things needed for this cake, is a large (about 3 liter) jar/container with an airtight lid. And plenty of patience!

The Ultimate Fruitcake

Phase 1

250 grams mixed dried fruits
125 grams dried cherries
250 grams dried dates
100 grams dried plums
100 grams raisins
100 grams tutti frutti
50 grams candied peel
150 grams ginger preserve
100 grams walnuts
150 grams cashewnuts
1/2 tsp nutmeg powder
2 tsp cinnamon powder
1 tsp clove powder
250 grams sooji/rava/farina/cream of wheat
500 ml brandy


Wash and dry plums and raisins.
Chop all fruits and nuts finely.
Keep aside the cashew nuts, walnuts and dates.
Roast sooji/cream of wheat till frangant, and very slightly browned. Allow to cool.
Mix all fruits (except cashew nuts, walnuts and dates) with the sooji/cream of wheat, spice powders, brandy and toss well.
Transfer to large airtight container.
Let soak for at least one week, and upto 3 weeks.

Phase 2

250 grams butter
500 grams sugar
12 eggs
100 grams flour
150 grams orange marmalade
25 ml honey
1 pinch salt
3 tbsp milk
2 tbsp vanilla essence
1 tbsp allspice
1/2 cup caramelized sugar

Cream butter and sugar till light and fluffy.
Sepetare eggs.
Add egg yolks to butter, one at a time, and beat till smooth.
Add salt, vanilla essence and allspice.
Beat egg whites till stiff.
Add mixed fruit, dates, nuts, flour, jam, honey and caramelised sugar a little at a time, alternating with egg whites.
Mix well after each addition, till all ingredients are used up.
Preheat oven to 175°C.
Pour batter into greased,lined baking pans (not more than 1.5" of batter per pan) and bake each batch for 45 mins or till done.

Notes on Storage:
Let cakes cool completely.
Wrap each cake in 3 layers of foil, and seal with cling-wrap.
Let age for at least a week.
Mine have stored for as long as 4 months.

31 March 2007

Indulgences

What's hot, sweet and bitter and absolutely delicious?

A wedge of bittersweet chocolate cake served with ginger sauce.

After that absolute frenzy of making up a batch of candied ginger, I was left with a large bottle of the cooking liquid. It was sweet, and had a lovely spicy-hot aftertaste. A couple of months ago, I'd had an interesting dessert at a restaurant here: dense, bitter chocolate cake served in ginger sauce. And this was the perfect time to replicate it.

But wait, there was a catch. Isn't there always? I had chocolate bars in plenty, very little cocoa, was almost out of flour and sugar, my weighing scale broke, and I didn't have a single recipe on hand that gave me the ingredients in volume. And it was snowing, and I was not one bit motivated to go to the supermarket. A thorough search through epicurious led me to this gem.


I did have to do some tweaking. Weights on the packaging on the butter and chocolate bars were in grams, and conversion was too much trouble. I decided that I was going to make my cake and eat it too, and took the plunge! And voila: easy, utterly uncomplicated, and fabulously delicious results.

This time, I had some ginger sauce ready-at-hand. Next time I want to find an uncomplicated way to make some without having to candy ginger first to get there!

Bittersweet Chocolate Cake

100 gms semisweet chocolate
100 gms bittersweet chocolate
1 tbsp cocoa powder
1 tsp instant coffee granules
100 grams unsalted butter
4 eggs (separated)
1/2 cup sugar
4 tbsp flour

Preheat oven to 170C and grease and dust 9" round pan.
Melt butter and chocolate over hot water. Add cocoa and coffee granules, and stir until smooth and lump-free.
Whisk yolks and sugar till very thick and pale yellow.
Mix in flour and chocolate mixture.
In another bowl, beat whites till stiff.
Fold into chocolate mixture.
Pour batter into prepared pan and bake for 30 minutes.
Let cake cool. Serve warm with ginger sauce.

02 March 2007

In pursuit of happiness

What makes me happy?? Chocolate of course.

Whatever the question, chocolate is always the answer. And what's better on a cold winter day, than a warm succulent delicious chocolate brownie?? With a hint of cinnamon and nutmeg enhance the bittersweet flavor of chocolate.

To tell the truth, I made it for January's Sugar High Friday, but never managed to get around to posting it. I was in the mood for a warm chocolate dessert, but not cake. This recipe on epicurious.com beckoned, and it was a breeze. I tweaked the chocolate quantities in the mix, and the result was fabulous.

And the little gourmet loved it too. She refused to call it a brownie. She named it 'kozha kozha (very sticky/messy) brown cake'.

I've now added this to my collection of 'gifting recipes'... no-brainer edible gifts for all occasions.


Brownies

1/2 cup all purpose flour
2 tsp ground cinnamon
1/2 tsp ground nutmeg
1 pinch salt
100 grams milk chocolate, chopped
100 grams bittersweet chocolate, chopped
130 grams unsalted butter, diced, room temperature
4 large eggs
50 grams sugar
1 1/2 tsp vanilla essence
1 cup walnuts (toasted and chopped)

Preheat oven to 170°C.
Generously butter 9x11-inch baking pan and dust with flour.
Sift salt, cinnamon, nutmeg and flour.
Stir chocolate and butter in a bowl set over simmering water until melted and smooth. Turn off heat. Let chocolate stand over water.
Beat eggs and sugar in large bowl until mixture thickens and falls in soft ribbon when beaters are lifted. It should have tripled in volume.
Add vanilla. Add flour mix in 2 additions. Blend well after each.
Add chocolate to egg mixture, beating until just combined.
Stir in walnuts.
Pour batter into panand bake brownies until top is set and tester inserted into center comes out with moist crumbs attached, about 35 minutes.
Cool completely.

Ganache
100 grams bittersweet chocolate, chopped
80 grams milk chocolate, chopped
20 grams butter
2 tbsp whipping cream

Whisk all ingredients in small saucepan over medium-low heat until melted and smooth. Pour evenly over brownies in pan.

Chill brownies until ganache is set.
Cut into squares.

And then it's time to sit back and enjoy a warm brownie, with just that subtle tang of spice. Mmmm... bliss... That's what happiness is all about.

26 November 2006

Bread and butter pudding

Ever had one of those days when you wanted some comfort food, but didn't want to work too hard at it? I managed to find the perfect dish for those days - bread and butter pudding.

This version is very stripped down, and takes only about 45 minutes to make - less than ten minutes of basic preparations and then the baking time. I call this the perfect recipe for instant gratification.

Bread and Butter Pudding
serves 1

2 slices white bread (crusts removed)
2 tbsp butter
2 eggs
1 cup whole milk
1/2 cup cream
1/4 tsp vanilla essence
1/4 tsp cinnamon
1 pinch nutmeg


Preheat oven to 150 C.
Butter bread slices. Trim and completely line an oven proof dish with the buttered bread.
Beat remaining ingredients together for the custard.
Pass custard through a fine sieve and pour over bread. Make sure custard covers bread by at least 2 cms.
Let it soak for about 10 minutes.
Bake for 30 minutes, or till tester inserted comes out clean.
Serve warm.

Notes:
Always ensure that even after soaking, custard completely covers the bread slices. (or pudding might end up slightly dry like this one)
If you use small molds, layer with just one slice/piece of bread in each. Bakes faster.

16 November 2006

Thank you.. with a Rich fruit-cake

While browsing through assorted blogs, I came across Meeta's Monthly Mingle, themed Give Thanks. I've just spent a good 2 weeks baking one of my favourite dishes, a rich fruit cake, and somehow it seemed just the right thing to contribute to such a lovely theme.

First things first. The thanksgiving!

Thanks are due all over the board. To my parents and sister for always being there for me, to my husband for putting up with ante-natal temper tantrums and emotional outbursts, and to my lovely 3 year old daughter (who for obvious reasons will not be allowed to even sample my culinary genius this time) for just being the sweetheart that she is!

To Kartik, Sangeeta, Soumya and Mythily for years of unconditional friendship and support. To Hemu and Axe who patiently listen to hours of my cribbing about something or the other, to my dearest friend Pons who's going to be a Dad sometime next year, to Sriram for helping me with photography tips n tricks (so the pics look more like food and less like manhole covers or bacteria cultures). And "Thanks" too, to other food bloggers who've dropped by and read my incessant ramblings!

So why did I pick this recipe?? Because it's so perfect, so what if a little off season, as a 'Thank You'. It never fails to warm me, like a sincere 'Thank You'...

Lots of assorted dry fruits, candied fruit and peel, soaked for as long as three weeks in brandy, baked for a long time and then allowed to ripen..... the end result, this simply fantastic cake! From the very first time I tried some, and then tried baking some, this has always been a bit of a challenge. I've spent ages trying to get it just right. I started with the original recipe, took some tips and hints from assorted sources, combined them all, and finally ended up with this gem.

The cake has three major steps. First is the soaking, then the baking and finally the aging! Trust me folks, it's worth every bit of hassle, and is definitely a keeper. The cake itself has a wonderfully long shelf life thanks to all the alcohol that goes into it!

And finally, Thank You Joan aunty, for sharing your family's special christmas cake recipe, inspiring me to higher standards in baking all those years ago and all your valuable baking tips and inputs.

Rich fruit cake

Fruits to soak

600 grams of assorted mixed fruits, candied fruit, candied peel

Ideally,
100 gms golden raisins
100 gms currants
100 gms dried plums (or cherries)
100 gms candied fruit
100 gms candied peel
100 gms dry seedless dates (chopped fine)
1 cup large sooji (rava)
1 cup brown sugar
1 tbsp cinnamon powder
1 tsp nutmeg powder
1 tsp allspice
500 ml brandy

Lightly dry-roast the sooji and cool to room temperature.
Toss assorted fruits, sugar and spices to mix well.
Keep aside 1/4 cup of mixed fruit.
Toss remaining fruit with sooji.
Put in a bottle with a tight fitting lid.
Pour brandy over fruit till just covered, and top with remaining 1/4 cup fruit.
Keep aside for at least 3 days.

Note:
I let my fruits soak for nearly 2 weeks before baking them. If you live in warm climate, I suggest placing the fruit mix in the fridge, and to soak for a maximum of 3 days.
Rum, or Marsala wine are a fantastic substitute for brandy. Dark rum gives it a lovely dark colour.


The cake mix

250 gms unsalted butter (at room temperature)
250 gms brown sugar
250 gms cake flour
2 tbsp baking powder
5 large eggs
1 tsp salt
1 tbsp vanilla essence
1 tbsp almond essence (optional)

Preheat oven to 180 deg C.
Line 4 loaf pans (3"x3"x8") with greaseproof paper.
Sift cake flour with salt and baking powder. Keep aside.
Cream butter and sugar till light and fluffy.
Beat eggs till frothy.
Add beaten eggs, little at a time, to the butter mix and blend well.
Add the essences and mix well.
Add flour, 4-5 tbsp at a time and mix well after each addition.
Before the final addition of flour, add the fruit mix.
Add the last batch of flour and stir gently till well combined.
Pour batter into prepared pans and bake in the bottom rack of oven for about 55 minutes.
If the top layer of the cake seems to be firm, loosely cover pans with foil and continue to bake till tester inserted into the center comes out clean.
Remove from oven and let cool in pans overnight.

Notes:
This cake needs to be baked dryer than normal pound cakes. So give it 10-15 minutes more than you nromally would. Do remember to cover with foil so that the upper crust does not char/burn.
If you don't have cake flour, plain or self-raising flour work fine too. If using self-raising flour, just skip the baking powder.

The Ripening

1 cup Brandy/Rum/marsala (optional)


Cool cakes are completely.

If you wish to flavour it further:
Prick holes into cake over regular intervals. Sprinkle liquor of choice over cake.

Double wrap each cake in 2 layers of aluminium foil.
Wrap once more with cling film, and keep in a cool, dry place away from light.
Let cake stand for at least a week before serving.
Store foil and plastic wrapped in airtight containers for upto 2 months.

Notes:
If you wish to add more liquor to the cake after the baking, be advised that it can be a little intoxicating, and not at all suited to little kids.
I've had people swear that this cake lasts for as long as 6 months, but I've never managed to keep any that long. All gets eaten as soon as I unwrap the first packet after ripening!


The end result is normally darker than the slices shown above, but yours truly could not wait to cut and try it out before ripening it. Also, I haven't seasoned it after baking. That would give it a richer colour.

So anyone game to join me for a nice afternoon tea?? I promise to serve this cake with a pot of nice hot tea. Just perfect for the thoroughly cold weather that we're having right now!

02 November 2006

Kaju-pista burfi

This is the reason I staggered out my Diwali goodies posts... no time! After a couple of prompts, I decided that today, come what may, I should get this done!!

Kaju Pista Burfi


Kaju Burfi
100 gms Cashewnuts
1 cup sugar
3/4 cup water
1/4 tsp cardamom powder

Soak cashewnuts in hot water for 15 minutes.
Drain and grind to a fine paste.
In a heavy bottomed pan, make a syrup of one string consistency with 1 cup sugar and 3/4 cup water.
Add ground cashewnuts and stir on a low flame till mixture starts to leave the sides of the pan.
Before taking off the flame, stir in cardamom powder.
Spread evenly on a greased plate.
Keep aside.

Pista Burfi
100 gms Shelled, unsalted pistachios
1 cup sugar
3/4 cup water
1/4 tsp cardamom powder
1 drop Green food colour (optional)

Soak pistachios in hot water for 15 minutes.
Drain well. Clean and rub off any extra skin left on the pistachios.
Grind to a fine paste.
In a heavy bottomed pan, make a syrup of one string consistency with 1 cup sugar and 3/4 cup water.
Add ground pistachios and stir on a low flame till mixture starts to leave the sides of the pan.
Before taking off the flame, stir in optional food colour and cardamom powder.
Spread evenly over the cashew burfi.
Let it stand for 5 minutes and cut into pieces while still warm.

Very simple, what??

Notes:
I haven't used any food-colouring in this preparation, but if you feel you want a nice green, do add a drop or two.
Also, instead of stirring cardamom powder into the burfi, I sprinkled all of it over the first layer before pouring the pista burfi mixture over it.

25 October 2006

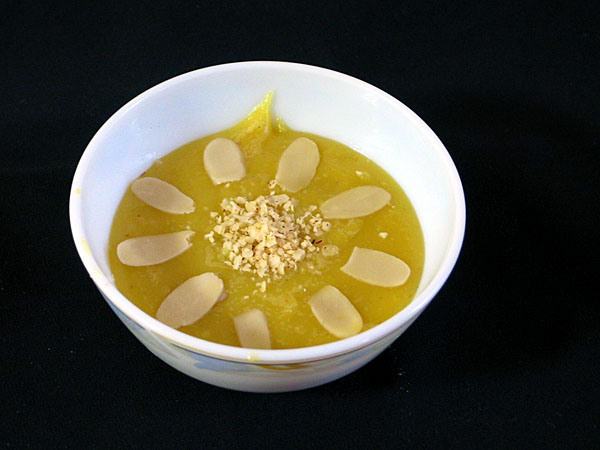
Badam Halwa

Badam Halwa


150 gms Almonds
3/4 cup sugar
1/2 cup water
1/4 cup milk
1/4 tsp cardamom powder
1/4 cup ghee (or more if required)
a few strands saffron
2 tbsp almond slices or slivers (for garnish)

Soak almonds in hot water for 20 minutes. Peel, and grind to a smooth paste with milk. Keep aside.
Bring sugar and 1/2 cup water to boil in a heavy bottomed pan.
Simmer and stir occasionally till sugar completely dissolves. Lower flame and simmer for 5 mins more.
Add almond paste and saffron. Stir till will blended and there are no lumps.
Cook on a very low flame till the mixture begins to leave the sides of the pan.
Add cardamom powder and mix well.
Add ghee, 1 tbsp at a time, stirring well after each addition till ghee to totally absorbed.
Transfer to serving bowl, and garnish.

Notes: If you continue stirring too long after mixture starts to leave the sides of the pan, it might tend to harden into a burfi after it cools to room temperature.

08 October 2006

Apple pie

Can anything beat a lovely apple pie on a cold rainy day?? And that too when the sun has set by quarter past 5??


This was one of those days... by 4, I had to have the lights on in the house. And the gloomy weather was starting to make me cranky. Very cranky!!

And I was in the mood to whip up a nice, warm dessert that wasn't overly sweet.

A quick look in the freezer showed that I had some sheets of puff pastry. And there were a handful of apples close at hand. And that lead to the making of a lovely warm apple pie! Perfect indulgence on a gloomy, dreary day.

For an amazingly simple and utterly delicious apple pie, do read on.

Apple pie
makes 2 pies in an 18cm pie plate

4 sheets puff pastry (20cmx10cm) (thawed)
4 large apples
1 cup raw sugar (brown sugar)
1 tbsp cinnamon
1/2 tsp nutmeg


Preheat oven to 160C
Peel, core and slice apples.
In a large bowl, toss apples with sugar, cinnamon and nutmeg. Let stand for a few minutes. Transfer to a large colander and let the excess liquid drain out.
Lightly grease pie plates.
Trim puff pastry to requires size and line the bottom and sides of the plate, leaving a 1/2 cm overhang.
Arrange apple slices neatly over base. Cover with remaining pastry.
Seal the edges and trim away any excess.
Bake till the crust is well browned (took me about 30 minutes)
Serve warm.

Notes: If you are making a fully covered pie, do remember to make a few slits on the top sheet to let out steam. A lattice pattern like this one has its steam vents :)

06 September 2006

Vermicelli and Milk Pudding - SHF23

(Just so I don't offend the traditional Indian chefs reading this, I gave Semiya Paayasam this slightly anglicised name to make it more recognizeable to other chefs in this month's SHF)

Since I first heard of SHF, I've wanted to work on one, but somehow never got around to it. But this month's sounded just wonderful, and I'd just tried this twist on a traditional favourite to rave reviews... from my husband and three-year-old daughter, who're absolute gourmets, and are rather difficult to please.

The traditional Semiya Paayasam is made with roasted vermicelli, milk, and sugar, and garnished with roasted cashewnuts, raisins, powdered cardomom and sometimes saffron.

The last time I made some of this lovely pudding, I thought, why not give it a few extras and see what comes of it?... I decided to fry figs, almonds, and cashewnuts in clarified butter, ground them to a smooth paste and added them to this old-fashioned traditional dish. The result was nothing short of spectacular. So here's hoping this is acceptable as a SHF entry! I'm posting this picture because I don't have a better one :( But I'm going to make it again before the deadline for this SHF, and hopefully get a better picture. (I could use some photography tips here)

Vermicelli Pudding
makes 6 servings


The Basics
1 cup fine vermicelli (broken into 1/4" pieces)
1 liter full cream milk
1 cup sugar (or more to taste)
1/2 cup water
1 pinch baking powder (optional)

Garnish:
1 tbsp chopped cashewnuts
1 tbsp raisins
2 pinches powdered cardomom
1 pinch saffron

The Surprise
4-6 dried figs
2 tbsps chopped almonds
1 tbsp chopped cashewnuts

1/4 cup clarified butter or ghee
(Note: If you're making ghee just for this one recipe, use one stick of butter in this recipe)

Heat 2 tbsps ghee. Lightly fry the figs , cashewnuts and almonds. Let cool.
Grind these to a smooth paste, adding water (if required) a teaspoon at a time. Keep aside.

In a heavy-bottomed saucepan, heat remaining ghee (clarified butter).
Lightly fry the cashews for the garnish till golden brown. Keep aside.
Lightly fry the raisins till well plumped. Keep aside.

Fry broken vermicelli , stirring frequently, till it starts to turn golden brown.
Add water and stir well. Add milk and baking powder and bring to a boil.
Lower flame and let the pudding simmer till reduced by 1/3rd. Stir frequently.
Add sugar. Stir and continue to simmer till completely dissolved.
Add the fig and nut paste, and stir until there are no lumps in the mixture.

Pour into a serving bowl, and garnish with the fried cashewnuts, raisins, cardomom powder and saffron.

This dessert can be served hot or cold. Tastes wonderful the next day too.

Note: I use baking powder only if I think the milk is likely to curdle... again, depends on kind of milk.

23 February 2006

... and I got it right!! At last!

Since Diwali, I've been trying to get my recipe for 'rasmalai' just right. I trawled the net for recipes and finally found one that satisfied the purist in me. But the most honest review that I got for that 5 hour marathon in the kitchen was: "what the @#$% are these golf balls doing in my dessert?"
Golf balls? Unfortunately yes. The paneer base kinda got a little too hard. Okok.. it was hard as a lump of coal. But the milky base was perfect.

This time I left out stuff that I thought mucked it up the last time. And I got it right.... after absolutely months of experimentation, I got it right... well, almost right. The paneer base wasn't sweet enough... but hey! That's healthier, isn't it? I made a really big batch of the stuff, and there wasn't any left by the time I thought to get a photograph.

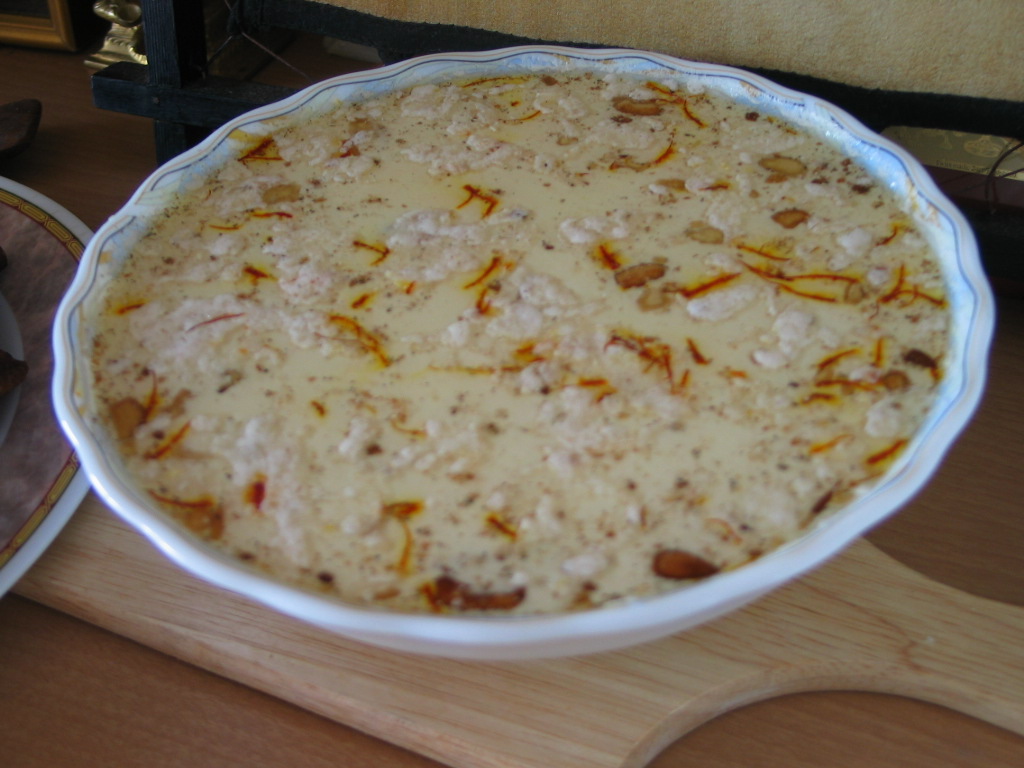
So here goes my recipe for rasmalai! This is rasmalai for purists.

Ingredients
2.5 ltrs full cream milk (I use Amul gold)
1 cup + 1/2 cup sugar
2 cups water
1/4 tsp citric acid
1 pinch saffron
1 pinch cardamom powder
2 tbsp chopped pistachio nuts (unsalted)
2 tbsp slivered almonds

oh yes, the most important thing: lots of patience.

Take 1.5 lts full cream milk in a heavy bottomed saucepan. Bring to a boil and reduce heat so that it simmers. Let milk reduce to about half its original volume (this is the tricky part. On a very low steady flame, takes 2 hours!) Add 1 cup sugar or to taste.

This is the basic rabri.

Boil 1 ltr milk and take it off the stove. Quickly stir in citric acid crystals. Wait for milk to split. Pour into a large sieve lined with a muslin cloth. When the whey drains out, quickly rinse the cheese with tap water, and press out excess water using fingertips.

Bring 2 cups water to boil. Add 1/2 cup sugar, stirring till sugar dissolves completely. Bring to simmer.

Knead the cheese with fingertips till soft. Divide into 10 equal parts, and shape them into smooth balls. Drop into simmering sugar syrup and let them simmer for about 5-7 minutes.
To test: take one ball out of syrup and press between fingertips. If it springs back to its original shape, its done right!

Using a slotted spoon, drain balls, and add to rabri. Simmer for 5 minutes. Transfer to serving dish and let it cool. Sprinkle saffron, cardamom powder and chopped nuts. Tastes best when chilled. Tastes great at room temperature too!